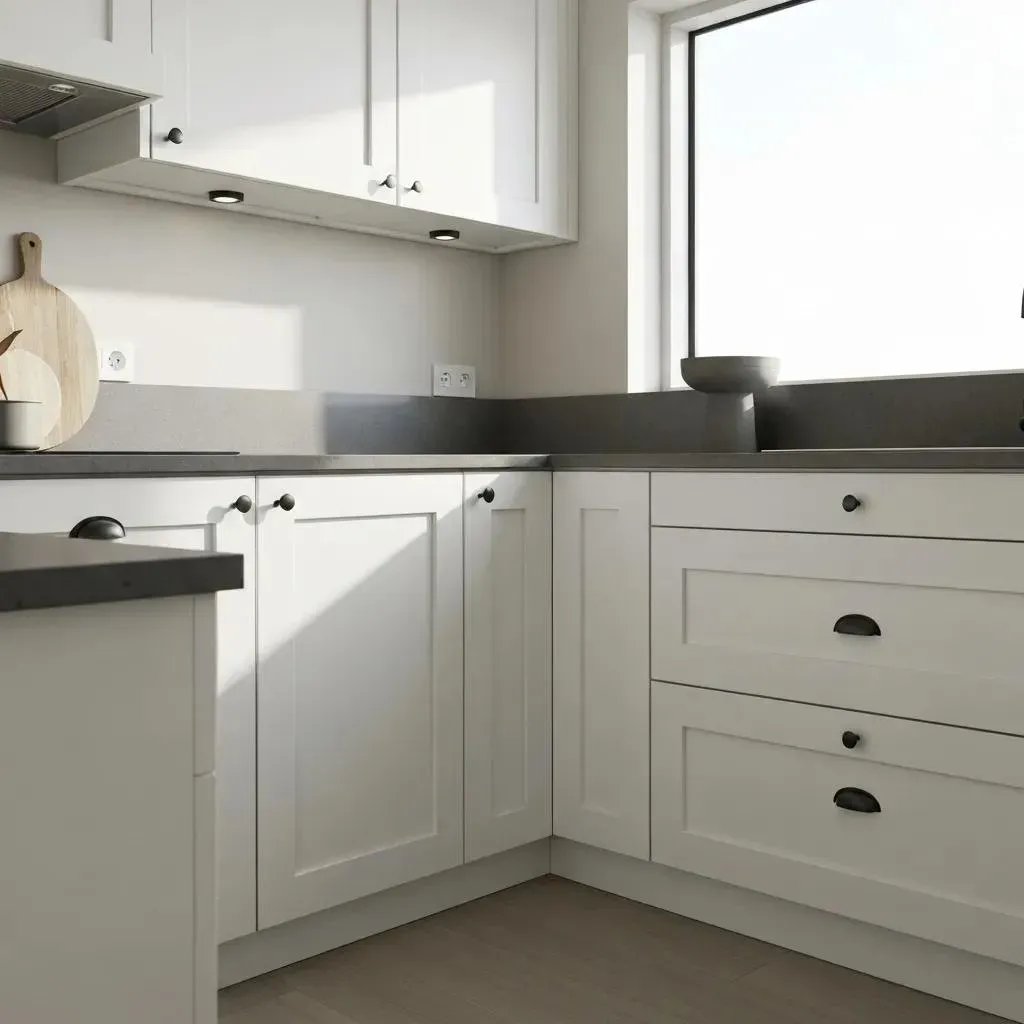
How to Plan Your Bathroom Renovation Without Losing Your Mind
The Smart Start to Stress-Free Bathroom Renovation
Bathroom renovation planning begins with setting clear goals, establishing a realistic budget, and creating a detailed timeline. Here's what you need to know:
- Assessment & Goals: Evaluate your current space and define specific needs
- Budget Planning: Allocate 10-20% contingency beyond your base budget
- Timeline Creation: Allow 6-8 weeks for a standard bathroom renovation
- Professional Consultation: Determine which aspects require contractors
- Design & Materials: Select fixtures, finishes, and layout before demolition
Renovating a bathroom can transform your daily routine, but without proper planning, it can quickly become overwhelming. The average bathroom remodel costs between $6,000 and $16,000 and can recoup up to 60% of its value when you sell your home. Yet the true value comes from creating a space that works for your lifestyle.
Many homeowners dive into demolition without considering the cascade of decisions ahead: Will you keep the current layout? What fixtures need replacing? How will you handle unexpected plumbing issues? A methodical approach saves both money and sanity.
I'm Mike Martinez from Accountable Home Remodeling, with over a decade of experience guiding Denver homeowners through bathroom renovation planning to create functional, beautiful spaces while avoiding common pitfalls and budget surprises.
Step 1 – Clarify Goals & Assess Your Existing Space
That beautiful bathroom you've been dreaming about starts with understanding what you actually have—and what you truly need. Before the first tile comes off the wall, take a moment to really see your current space with fresh eyes.
I love what interior designer Holly Rickert suggests to my clients at Accountable: "Use Post-Its to note why you like each bathroom image you've collected." It's amazing how this simple exercise reveals patterns in what you're drawn to versus what will actually work in your home.
Think about your daily frustrations with your current bathroom. Is it the lack of counter space that drives you crazy every morning? The poor lighting that makes shaving or applying makeup difficult? Or maybe it's the cramped shower that never quite feels comfortable? Understanding these pain points gives your renovation purpose beyond just "making it prettier."
Consider who uses this bathroom regularly. A family bathroom serves different needs than a primary ensuite or guest bath. Are there small children who need tub access? Someone with mobility concerns who would benefit from grab bars or a curbless shower?
The National Kitchen and Bath Association reports that over 50% of homeowners choose to change their bathroom layout during remodeling—and for good reason. Our needs evolve, and sometimes the original bathroom design simply doesn't work anymore.
Create a Wish-List & Deal-Breaker Map
Let's get organized about your bathroom dreams. Think of this as creating a roadmap for your decisions:
Must-haves are your non-negotiables—perhaps a larger shower, better ventilation, or adequate storage for everyone's toiletries. These items form the foundation of your renovation and should get priority in your budget.
Nice-to-haves are the elements that would be wonderful but aren't essential—heated floors, a rainfall showerhead, or custom tile work. These are the first items to reconsider if your budget gets tight.
Deal-breakers are the absolute no-gos. Maybe you're adamant about not losing your bathtub, or perhaps you refuse to have a bathroom without natural light. Identifying these boundaries helps prevent disappointment later.
Designer Doreen Chambers notes, "My client loves a spa environment: crisp, clean, classic with minimum embellishments." What's your version of bathroom bliss? Maybe it's a sleek, minimalist retreat or a warm, traditional space with classic fixtures.
If resale value matters to you, bathroom renovation planning should balance personal preferences with universal appeal. While that steam shower might be your dream feature, potential buyers might place more value on double vanities or ample storage.
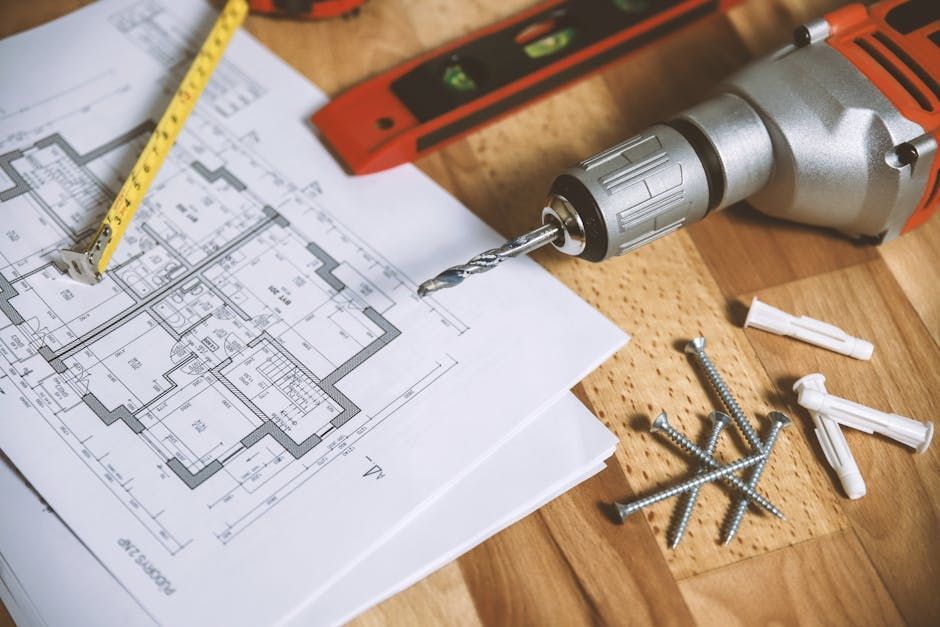
Measure & Photograph Everything
Trust me on this one—accurate measurements are the foundation of successful bathroom renovation planning. I've seen too many disappointed faces when that perfect vanity won't fit through the bathroom door or the dream shower enclosure interferes with the toilet placement.
Grab a tape measure and note:
- Room dimensions (length, width, and ceiling height)
- Window and door locations, including which way doors swing
- Current plumbing fixture locations
- Electrical outlets and switch placements
- Ventilation features and lighting positions
Don't forget to locate wall studs, which will be crucial for mounting heavy items like cabinets or grab bars. A stud finder is a worthy investment here.
"Use laser levels, spacers, and leveling clips for precise tile alignment," as one of our veteran tilers with 20 years of experience always says. These tools aren't just for professionals—they can save DIYers countless hours of frustration.
Take detailed "before" photos from multiple angles. These images become invaluable when communicating with contractors and suppliers. They help everyone visualize the starting point and can reveal potential issues that might otherwise be missed during planning discussions.
Here at Accountable Home Remodeling, we've found that clients who thoroughly assess their existing space before demolition begins typically experience smoother renovations with fewer unexpected challenges. A little upfront effort in this phase pays dividends throughout your bathroom change journey.
Step 2 – Build a Realistic Budget (and Contingency)
Let's talk money—the part that makes most homeowners break into a cold sweat. The National Kitchen and Bath Association tells us the average bathroom renovation runs about $11,000, but I've seen projects range from simple refreshes to luxury changes that would make a spa jealous.
Here's something crucial to understand: about two-thirds of your total cost will go toward labor. This holds true whether you're planning a modest update or creating your dream bathroom oasis. It's just the reality of renovation work.
When I sit down with clients to build their budgets, we always break it down into the major categories: demolition and hauling away the old materials, any structural changes, plumbing work, electrical updates, ventilation improvements, waterproofing (never skimp here!), tile and flooring, fixtures like your toilet and sink, cabinetry and storage solutions, lighting, and those finishing touches that make the space feel complete.
"I always tell my clients to expect surprises," shares Carlos, one of our veteran contractors. "Setting aside 15-20% of your budget as contingency isn't being pessimistic—it's being realistic." This is especially important in older Denver homes, where opening up walls can reveal outdated wiring that doesn't meet code, corroded pipes, or hidden water damage that's been silently wreaking havoc.
Prioritize Must-Haves vs Nice-to-Haves
I like to remind homeowners about the quality-service-cost triangle: "You can only get two of three... which two is up to you." Want top-notch materials installed by the best professionals? That won't be the budget option. Working with tight finances? You might need to compromise on either materials or who's doing the installation.
When deciding where to invest and where to save, I recommend my clients splurge on items affecting functionality and durability. Quality plumbing fixtures and proper waterproofing might not be Instagram-worthy, but they'll save you from expensive headaches down the road. Meanwhile, you can save on decorative elements that can be easily changed later, like paint colors, cabinet hardware, or accessories.
One of our designers, Melissa, puts it perfectly: "There is nothing worse than envisioning a gorgeous natural stone tile then having to get a lower grade tile because you ran out of money." Plan your big-ticket items first, then see what's left for the finishing touches. Your bathroom renovation planning should always prioritize function before beauty.
Financing & Cost-Saving Hacks
Not everyone has a renovation fund just sitting in their bank account, and that's okay! Many homeowners explore financing options like home equity loans or lines of credit, which typically offer lower interest rates since they're secured by your property. Personal loans are another popular choice, while some manufacturers offer special financing for major purchases like custom shower systems.
Want to make your budget stretch further? Consider these insider tricks:
DIY the demolition (with proper safety gear, please!). Tearing out old tile and fixtures can save you hundreds in labor costs. Shop end-of-season sales for fixtures and materials—January and August often feature bathroom fixture clearances. Keep plumbing fixtures in their current locations whenever possible. "The toilet is the most expensive thing to move," explains Pete, a Denver plumber with 15 years of experience. Moving a toilet just three feet can add $1,000+ to your project.
For countertops, ask stone yards about remnant pieces from larger projects—these discounted pieces are perfect for bathroom vanities and can save you 40-60% compared to buying a full slab. And don't overlook the power of refreshing rather than replacing. Sometimes refinishing an existing tub or repainting cabinets can transform your space without breaking the bank.
At Accountable Home Remodeling, we pride ourselves on transparent budgeting. We'd rather have the tough conversations upfront than surprise you with change orders halfway through your bathroom renovation planning process.
Step 3 – Bathroom Renovation Planning Essentials
The planning phase is truly where bathroom dreams become reality – or where they can fall apart without proper attention. This critical stage lays the groundwork for everything that follows, from securing necessary permits to creating a realistic timeline that won't leave you showering at the gym for months.
Here in Denver, most bathroom renovations require permits, especially when you're modifying plumbing, electrical systems, or removing walls. The permit process can vary dramatically depending on your specific municipality and project scope – sometimes taking just a few days, other times stretching to several weeks.
"A typical remodeling project involves at least 14 inspections," shares one of our trusted local contractors. "You typically lose one day per inspection." This isn't meant to discourage you, but rather to help you build a realistic schedule that includes these necessary pauses. Bathroom renovation planning becomes much less stressful when you anticipate these inspection days from the start.
When gathering contractor bids, resist the temptation to automatically choose the lowest number. What looks like a bargain can quickly turn expensive if the work is subpar or incomplete. Instead, evaluate each bid for:
- A detailed scope of work that clearly outlines what is (and isn't) included
- A transparent payment schedule that protects both you and the contractor
- A timeline that seems ambitious yet realistic
- Proper documentation of insurance and licensing
- References from homeowners with similar projects
Material lead times can make or break your renovation schedule. "Order all fixtures (including rough-in valves) and materials before demo day," advises one of our experienced designers. While standard fixtures might arrive within 3-4 weeks, custom items often require 8-12 weeks or more – especially with today's supply chain challenges. More info about FAQs
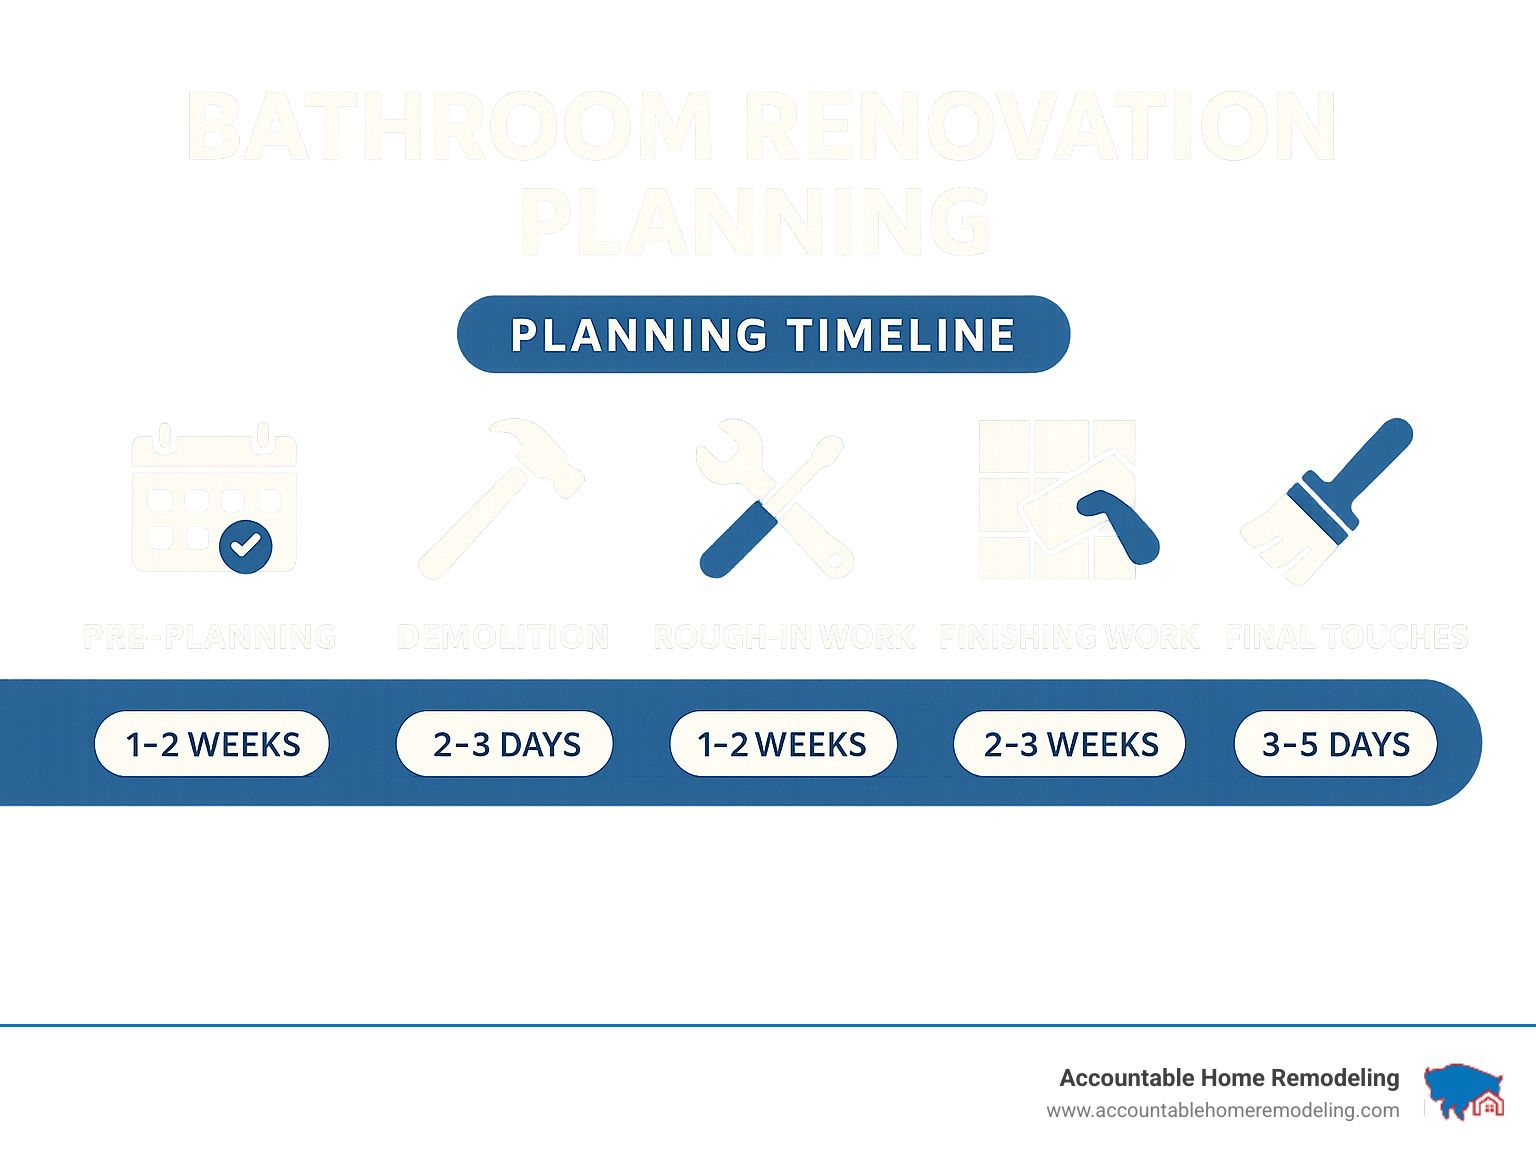
Detailed Timeline for Bathroom Renovation Planning
A well-orchestrated bathroom renovation follows a logical sequence that minimizes downtime and prevents costly rework. Here's what you can expect:
Your journey begins with pre-construction (approximately 90 days), where all planning, permitting, and material ordering happens. This phase feels slow but sets you up for a smoother active renovation.
Next comes demolition (2-3 days), where your existing bathroom is carefully dismantled. This is followed by rough-in work (1-2 weeks), when new framing, plumbing, electrical, and structural changes take shape behind the walls.
The inspection phase follows, where various officials verify that plumbing, electrical, and structural elements meet code requirements. Then comes waterproofing (1-2 days plus curing time) – a step you absolutely cannot rush.
"Waterproofing membranes can require up to five days to cure," one of our professional tilers emphasizes. This patience prevents thousands in potential water damage repairs down the road.
Tile installation (3-7 days) transforms the space, typically with walls completed before floors. Next, fixture installation (2-3 days) brings in your vanity, toilet, and shower/tub fixtures. Finishing touches (2-3 days) add hardware, mirrors, and accessories that complete your vision.
Finally, the final inspection and punch list addresses any remaining issues before you officially reclaim your bathroom.
Hiring & Scheduling Trades
Most bathroom renovations require a team of specialists working in careful coordination:
Your general contractor orchestrates the entire renovation symphony, while a licensed plumber ensures all water connections meet code requirements. A licensed electrician handles all power-related work safely, and a skilled tile installer creates waterproof, beautiful surfaces.
Depending on your design, you might also need a cabinetry installer, painter, and glass installer for custom shower enclosures.
"Daily check-ins with your contractor are essential," recommends a homeowner who successfully renovated three bathrooms. These regular touchpoints help catch potential issues early, before they become expensive problems.
We strongly recommend requesting lien waivers from all subcontractors as they complete their work. This simple paperwork protects you from potential claims if payment disputes arise between the general contractor and their subcontractors.
At Accountable Home Remodeling, we handle all these moving parts for our Denver-area clients. Our systematic approach ensures each trade arrives precisely when needed and completes their work to our exacting standards – giving you peace of mind throughout your bathroom renovation planning journey.
Step 4 – Layout, Materials & Design Decisions
Now comes the fun part—designing your new bathroom! This is where your vision takes shape through specific choices about layout, fixtures, and finishes.
Ergonomics should guide your layout decisions. "Standard bathroom vanity height used to be 30 inches; modern standard is 36 inches," notes architect Bud Dietrich. This simple change can dramatically improve comfort for most adults, eliminating that slight bend that strains your back every morning.
Even if accessibility isn't currently on your radar, consider universal design principles in your bathroom renovation planning. Features like curbless showers, wider doorways, and strategically placed blocking for future grab bars aren't just for aging populations—they create versatility that appeals to everyone.
"Zero-threshold showers are worth the extra cost for graceful aging in place," advises a design expert I recently spoke with. They're also increasingly popular with buyers of all ages, who appreciate the clean, spa-like aesthetic they create.
Creating a mood board that collects your material and color choices provides a visual reference to ensure all elements work together harmoniously. When our Denver clients bring together samples of their tile, cabinetry finish, countertop material, fixture finishes, paint colors, and grout choices, the big picture suddenly becomes clear. Those who skip this step often end up with bathrooms that feel disjointed.
A veteran tile installer once shared this gem with me: "Always lay out tiles in the orientation they'll be installed—floor vs. wall—for accurate color sampling." This simple trick prevents those disappointing surprises when your perfect tile suddenly looks completely different on your bathroom wall than it did in the showroom.
Optimize Layout for Flow & Accessibility
When rethinking your bathroom layout, consider practical clearances that make daily routines more comfortable. Allow at least 30 inches in front of fixtures so you're not bumping into things. Position the toilet with at least 15 inches from center to any side wall—trust me, your knees will thank you.
Make sure shower doors have adequate room to open without obstruction (a surprisingly common oversight!). And for tight spaces, pocket doors can be absolute game-changers, freeing up the swing space that traditional doors require.
"Would you sacrifice a bathtub to get a larger shower?" This question from a recent design survey reveals an interesting trend—many homeowners are choosing luxurious walk-in showers over rarely-used tubs. If yours is the only bathroom in the house, however, keeping at least one tub may be wise for resale value, especially in family-friendly neighborhoods.
For families sharing bathrooms, consider how multiple users will interact with the space. Double sinks or an extra-wide single sink can prevent morning traffic jams. A separated toilet area offers privacy when someone needs to brush their teeth while another person is using the toilet. And thoughtful storage solutions ensure everyone has a place for their personal items.
"We wanted to create a strong focal point in this bathroom and the wet room concept brought that to life," explains designer Lindye Galloway. A wet room—where the shower isn't fully enclosed—can make a small bathroom feel more spacious and luxurious. It's one of those design choices that transforms a utilitarian space into something special.
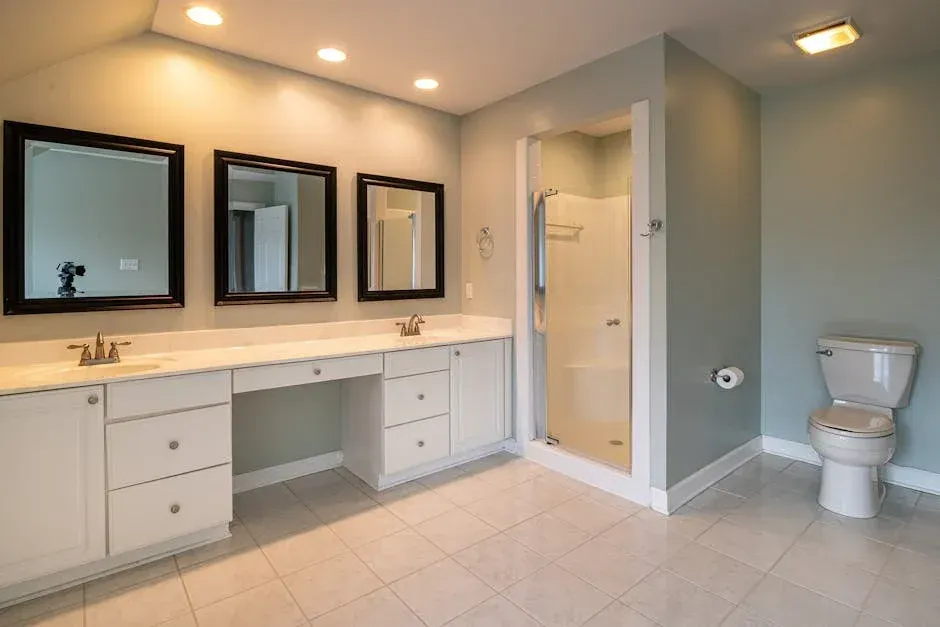
Select Fixtures, Finishes & Storage Solutions
Your fixture choices impact both aesthetics and functionality in profound ways. For vanities and sinks, floating options create a sense of space and allow for custom heights—perfect for very tall or short family members. Vessel sinks make a bold statement but provide less usable sink space, while undermount sinks offer clean lines and make counter cleaning a breeze.
In the shower and tub department, walk-in showers with frameless glass maximize visual space and create that high-end hotel feel. Freestanding tubs serve as spa-like focal points that invite long, relaxing soaks. And don't forget shower niches—these recessed shelves eliminate the need for unsightly caddies while keeping your shampoo and soap within easy reach.
"Adding an archway to a shower is an unexpected touch that brings extra charm and character to the space," suggests designer Micaela Quinton. These architectural details can lift a standard shower to a custom retreat without breaking the bank.
Smart storage solutions make the difference between a beautiful bathroom and a functional one. Medicine cabinets with integrated lighting serve double duty. Floating shelves keep frequently used items handy. Linen cabinets store towels and bulk supplies. And drawer organizers maximize every inch of vanity storage.
One of my favorite questions to ask during bathroom renovation planning is: "Could a closet be turned into a custom cabinet offering lots of stash spots?" This creative thinking has led many homeowners to find hidden storage potential they never knew existed.
For those concerned about sustainability and utility bills, look for WaterSense-labeled fixtures, which use at least 20% less water without sacrificing performance. At Accountable Home Remodeling, we've seen these eco-friendly choices reduce water bills while still providing excellent shower pressure and flushing power.
For more inspiration on creating truly special spaces, check out our More info about Luxury Bathroom Designs page. And if environmental impact is important to you, our guide to More info about Green Building Materials offers practical options for creating a healthier home. For those concerned about bathroom moisture issues, Scientific research on mold-resistant surfaces provides valuable insights into creating a bathroom that stays beautiful for years to come.
Step 5 – Execution Roadmap & On-Site Management
With planning complete and materials ordered, it's time for execution. This phase transforms your bathroom renovation planning into reality.
Start by preparing your home:
- Clear a path from the entrance to the bathroom
- Protect flooring along this path
- Remove all personal items from the bathroom
- Set up a temporary bathroom solution if this is your only bathroom
- Establish a staging area for delivered materials
"Make sure you clean and prepare the site as best you can to ensure that the job goes smoothly, and brace yourself for any unforeseen issues to arise," advises a renovation expert.
Demolition requires proper safety precautions:
- Turn off water and electricity to the bathroom
- Wear protective gear (goggles, gloves, dust mask)
- Use drop cloths and plastic sheeting to contain dust
- Arrange for appropriate disposal of debris
Proper waterproofing is critical in wet areas. "RedGard is a waterproofing and crack-prevention membrane applied before tiling walls," explains a professional installer. "PVC pan liner and pan mud must be graded to direct water toward the drain." These technical details make the difference between a lasting renovation and future headaches.
Quality Control & Problem-Solving During Bathroom Renovation Planning
Even with perfect planning, challenges arise during renovation. Common issues include:
- Finding hidden damage (water damage, mold, rotted subfloor)
- Plumbing or electrical surprises behind walls
- Material delays or defects
- Measurement discrepancies
This is where your contingency fund proves invaluable. "If a project runs a few days over, try not to get frustrated. If that's the biggest problem you've had, you got off easy," advises a veteran renovator.
Document everything with photos and written records, especially when changes to the original plan are needed. Formal change orders should detail:
- The specific change requested
- The reason for the change
- The cost impact
- The timeline impact
- Signatures from both you and the contractor
Daily cleanup is essential for safety and sanity. At Accountable Home Remodeling, we ensure our work areas are tidy at the end of each day, minimizing disruption to your household.
Final Inspections, Finishing Touches & Styling
As construction wraps up, schedule final inspections and create a punch list of any remaining items needing attention. Walk through with your contractor and note even small details—this is your opportunity to ensure everything meets your standards.
Don't overlook these important finishing steps:
- Seal grout to prevent staining and moisture penetration
- Apply silicone caulk around fixtures and where surfaces meet
- Test all plumbing for leaks and proper function
- Verify electrical outlets and switches work correctly
- Check ventilation for proper operation
Once construction is complete, the fun begins—styling your new space:
- Layer lighting (ambient, task, and accent) for flexibility
- Add plants for life and color (choose varieties that thrive in bathroom humidity)
- Install hardware and accessories in coordinating finishes
- Hang art (properly sealed against moisture)
- Select luxury towels and bath accessories
"No urban zen bathroom is complete without living greenery. Fact," asserts one designer. Plants not only look beautiful but can improve air quality in your bathroom.
Smart accessories can add convenience and luxury:
- Programmable shower systems
- Motion-sensor faucets
- Heated towel racks
- Bluetooth speakers
- Smart mirrors with integrated lighting
Frequently Asked Questions about Bathroom Renovation Planning
How long does a typical bathroom remodel take from demo to final inspection?
When clients ask me about timelines, I tell them most bathroom renovations take between 6-8 weeks from the first swing of the hammer to the final inspector sign-off. But like any good home improvement story, there's more to it than just one number.
The timeline dance depends on several partners: the scope of your project (are we talking a simple refresh or a down-to-the-studs renovation?), whether you've chosen stock fixtures or that gorgeous custom vanity from Italy, and how quickly your local building department processes permits.
Here in Denver, our team at Accountable Home Remodeling typically sees about 2-3 weeks of active construction time for a standard bathroom remodel. But don't forget the "invisible" time before construction even begins – planning, designing, and waiting for materials can add several weeks to your calendar.
I always smile when clients are surprised by this timeline. "But it's such a small room!" they say. True, but that small room contains nearly every building trade: plumbing, electrical, carpentry, tile work, and more. Each needs their time to shine (and dry, and cure).
Which permits are usually required and who pulls them?
The permit question often makes homeowners groan, but I promise this bureaucratic step protects both your investment and your safety. Throughout the Denver metro area, you'll typically need permits for:
Plumbing changes beyond simple fixture replacements, electrical modifications (especially adding outlets or moving lighting), structural alterations like removing walls, and ventilation updates that affect your home's mechanical systems.
While you technically can pull permits yourself, I've seen the confused looks on homeowners' faces at the building department enough times to recommend letting your contractor handle this. We speak the language of permit offices and know exactly which forms need filing and when.
The contractor who pulls the permit shoulders the responsibility for scheduling inspections – both during construction (those "rough-in" inspections before walls get closed up) and after everything's complete.
I've had more than one client ask about skipping permits to save time or money. I always gently explain that while it might seem tempting, unpermitted work can cause major headaches when selling your home and might even void your insurance coverage if problems arise. Not worth the risk!
What percentage of my budget should I set aside for surprises?
I love the look on clients' faces when I tell them about contingency funds – it's a mix of concern and curiosity. The industry standard is setting aside 10-20% of your total budget for those "uh-oh" moments that inevitably pop up during renovation.
Where you fall in that range depends on a few factors. Living in a charming 1920s bungalow? Lean toward the higher end. Previous homeowners fancy themselves weekend warriors? Definitely plan for 20%. First-floor bathroom in a newer home? You might get away with 10%.
A recent client laughed when I suggested a contingency fund, saying her bathroom was "perfectly fine behind the walls." Two days into demo, we finded previous owners had vented the shower directly into the wall cavity. The resulting mold remediation would have been devastating to her budget without that safety net.
Common surprises we uncover include: hidden water damage (especially around toilets and tub surrounds), outdated wiring that doesn't meet current safety codes, plumbing configured in ways that defy logic and physics, damaged subfloors, and in older Denver homes, occasionally asbestos or lead that requires special handling.
At Accountable Home Remodeling, we pride ourselves on thorough pre-construction assessments to minimize these surprises, but even with thermal imaging and moisture meters, some issues simply hide until demolition begins. Having that contingency fund means finding a problem becomes a brief conversation about solutions rather than a project-halting crisis.
Conclusion
Changing your bathroom from a dated necessity into a personal sanctuary doesn't have to feel like climbing Mount Everest. With thoughtful bathroom renovation planning, you can steer this journey with confidence and even enjoy the process along the way.
Think of this roadmap as your renovation GPS – guiding you from initial vision to final reveal without those frustrating wrong turns that cost time and money. We've walked hundreds of Denver homeowners through this process, and those who take the time to plan properly consistently report smoother renovations and more satisfying results.
Remember the foundation stones of successful bathroom changes: begin with honest assessment of your needs, create a budget that includes breathing room for surprises, develop a realistic timeline that accounts for material lead times, select design elements that balance beauty with function, and manage the execution phase with attention to detail.
The most successful renovators share a common trait – flexibility. Even with meticulous planning, renovation surprises happen. That water stain might reveal more extensive damage, or that perfect tile might be backordered. When you've built contingency into your budget and timeline, these bumps in the road become manageable detours rather than project-derailing disasters.
Beyond the practical aspects of your renovation, don't lose sight of why you started this journey. A well-designed bathroom creates those small daily moments of comfort and joy – the perfect shower pressure after a long day, the neat vanity that makes your morning routine a pleasure, the heated floors that welcome bare feet on winter mornings.
While a thoughtfully renovated bathroom typically recoups 60-70% of its cost when you sell your home, the true value lies in the years of enjoyment before that day ever comes. As one of our Westminster clients recently told us, "I never realized how much my cramped, outdated bathroom was affecting my daily mood until I had a space that actually worked for me."
At Accountable Home Remodeling, we believe everyone deserves a bathroom that feels like it was designed specifically for them – because when we handle your renovation, it truly is. Our transparent communication, attention to quality, and commitment to staying on budget have made us trusted partners for homeowners across Broomfield, Westminster, Thornton, Northglenn, Arvada, Boulder, Denver, Longmont, Aurora, and Lakewood.
Your dream bathroom is closer than you think. The journey starts with a conversation about your vision, needs, and budget. Reach out today, and let's transform your bathroom from a source of daily frustration into your home's hidden gem.